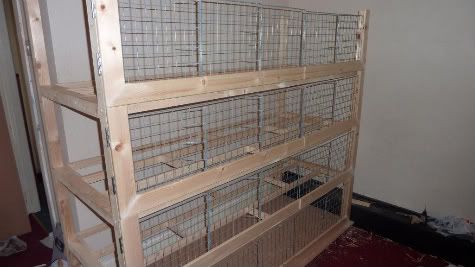
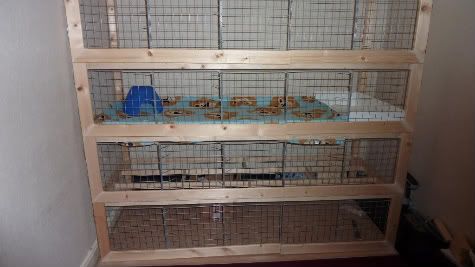
The build of the C&C cage was completed around 2 weeks ago. We now have a 5x2 C&C cage to house our three trios - One on each floor with a level for storage underneath. I am really happy with the result. Full credit to Paul for the finished result as whilst I helped by handing over tools when required, he put a lot of time and effort into making the cage for me and our piggies.
This cage was pretty much made up as we went along and there were problems which we had to overcome because of this. But it has turned out well and is easier to clean than their store bought indoor cage set up (yay!). It has also meant that the piggies are now upstairs in the spare room.
So here we go!!
We started with a 12mm MDF board cut to the size we required. We attached six castor wheels to the underside of it;
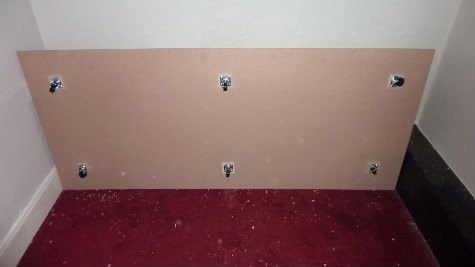
This is so that the cage can be moved if we need to get behind it, although I don't plan on moving it unless absolutely necessary.
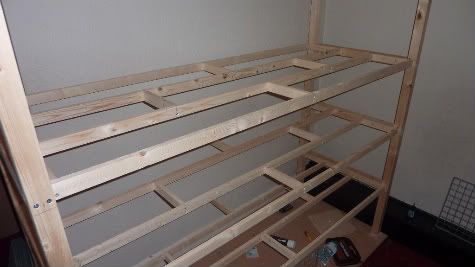
We then attached the corner posts which are 50mm x 47mm lengths of wood;
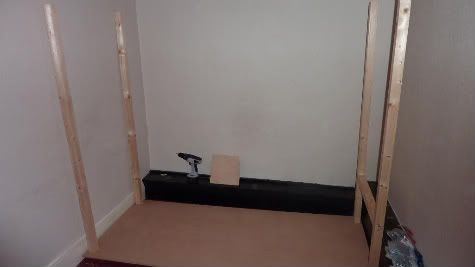
Supporting bars on the left and right hand sides were also made from the 50mm x 47mm lengths.
The batons and cross supports holding the floors up were made from 38mm x 19mm lengths of wood;
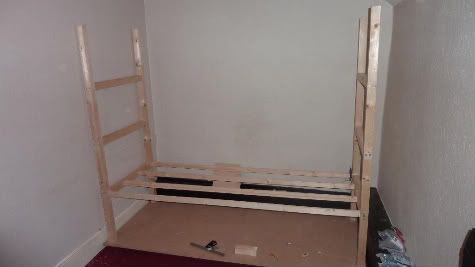
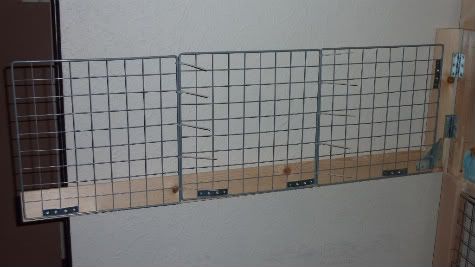
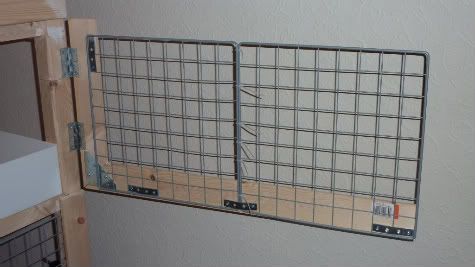
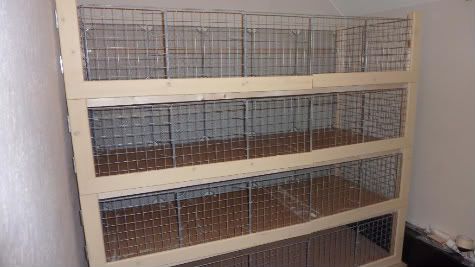
The doors are hinged from the front corner posts; 3 panels open to the left and 2 panels open to the right. The wood used on the sides and bottoms of the doors are skirting boards;
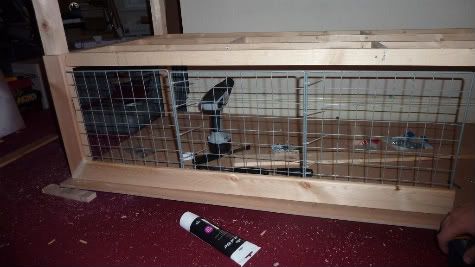
The C&C panels are held in place with metal brackets;

The doors were hung from all levels of the cage;
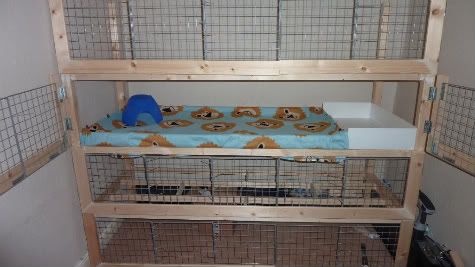
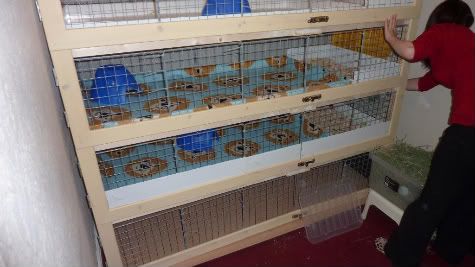
I wanted two areas for my piggies in the cage, one with incontinence pads and fleece and another with some sort of bedding they can dig about in. I cut two correx trays for each floor;
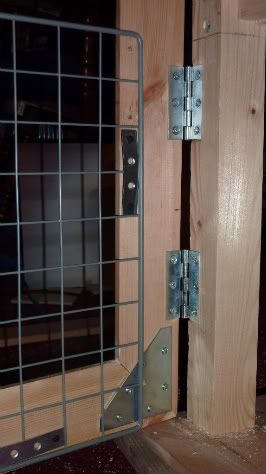
Here are some more pics of the doors;
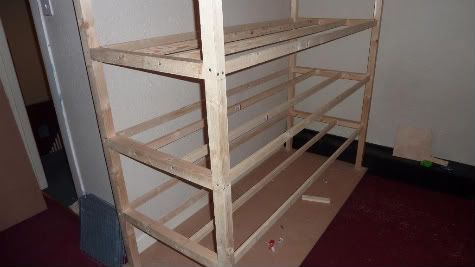
We then painted the front of the doors with Protek wood stain, although because it is cream, it hasn't made much of a difference to the original colour, if has just covered over the filler a little bit. We also tacked down 3mm hardboard for the floors of the cage;
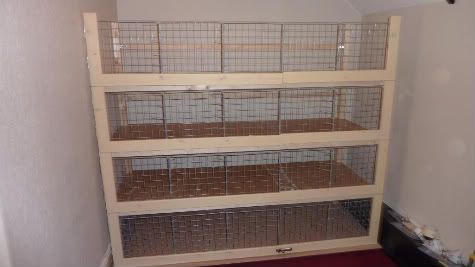
Next was the addition of the rest of the C&C panels;
I have used mesh panels on the back wall to prevent spillages and grids around the rest of the cage. The side and back panels have been held in to place by horse shoe shaped tacks.
Latches were added to hold the doors in place.
The first floor cage has been mini-pig proofed with some additional correx because Hermione is still quite small. This will be removed once she's a bit bigger.
We put the correx trays/bedding in place and filled the external hay racks with Oxbow;
Although I'm bending over a little, you can see the size of the cage, it is pretty huge!! (I'm 5ft 6in)
And all that was left is for some piggies to move in!!
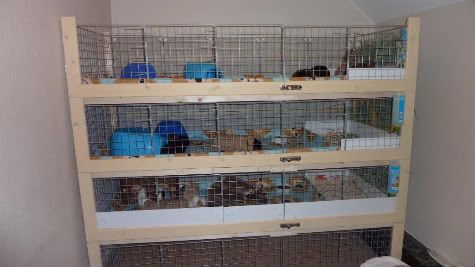
Henry, Nala and Hermione are on the first floor. Audrey, Seymour and Mushnik are on the second. Sasha, Mabelle and Penelope are on the third. The ground floor is used for storage, it where all their bits and pieces are kept.
Problems we came across;
* The door latches on the front didn't actually work. Because there is no stationary point, the doors could be pulled open with easy. A piggy leaning on them would have made them swing open and the piggy would have fallen out. We've had to add another latch to the back of the left hand door to hold that one in place. This makes latch on the front of the door work.
* I cut all of the correx the wrong size. This was because I cut it before all the panels were in place so I assumed that it would fit. It didn't.
* The water bottle doesn't fit next to the hay rack (on the right hand side). We'll drill a hole through the correx for the spout another day. This will correct the problem. I'd rather not have it attached to the door.
All in all, we used 20 mesh panels and 36 grid panels (4 boxes of storage cubes), MDF, hardboard, 50mm x 47mm lengths of wood, 38mm x 19mm lengths of wood, hinges, brackets, paint, correx, various screws and tacks. I haven't worked out the total cost as yet.
Soooooo! It's done! Phewwwww!
 It is almost November, which means I need to start thinking about Christmas gifts. I'm not sure what I'm going to get the piggies this year. Last year, they got shampoo! *yawn* Perhaps this year they might receive some nice beds instead. I think that they will be better received than a dreaded bath!!


